How to glaze a cake properly
Learning how to glaze a cake properly is a big part of life in professional kitchens and cake shops. If done right, in my opinion there is no cleaner way to finish a cake than with a glaze.
Most glazes are made with a base of water, sugar, gelatine, glucose, flavouring and colour.
This obviously varies depending on the variation and flavour but the main ingredients tend to be fixed in most recipes.
Using a glaze gives a cake or petit gateaux a very professional finish as long as it sets evenly. You also need to make sure it isn’t too thick or too thin. Too thin and you can see through the glaze in patches. Having it too thick means it isn’t particularly nice to eat since most glazes set like a firm jelly.
The best thing to glaze is mousse (when it is frozen). I have seen some absolute disasters in the past with people trying to glaze things like sponge cakes and biscuits.
The problem is that pouring glaze onto a sponge just soaks it up like… well.. a sponge. It doesn’t stick particularly well to room temperature or uneven surfaces.
Where you would use glazes
If you want to glaze a cake there are two main ways of doing it. You can either cover the sponge in chocolate ganache (what we call masking) and set it in the fridge. This gives the outside of the cake has a nice cold, smooth and un-porous surface to stick to.
The other option is a mousse based cake called an entremet. This is where you build layers a mould, for example, lemon curd, raspberry compote and a sponge base and then freezing those layers. Once you have the layers you “inject” this into a bigger mould filled with mousse. That is then frozen whole before taking the whole cake out when it is solid to glaze.
This then softens back into its previous state at room temperature before being served.
These are by far the easiest things to glaze. This is the most common method for making modern petit gâteaux and large glazed cakes.
Cake Glaze Recipes
Dark glaze recipe
360g Caster sugar
120g Cocoa powder
280g Water
210g Whipping cream
22g Gold leaf gelatine
Method
Soak the gelatine in ice or at least very cold water, be sure to put the leaves into the water separately and not in a stack.
Then mix together the sugar, cocoa powder, water and cream in a saucepan. Make sure everything is well mixed to a paste and there is no unmixed dry ingredients lingering at the bottom that could burn.
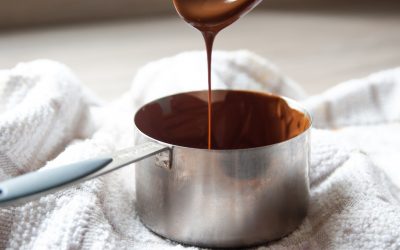
Bring this mix to the boil slowly, stirring continuously with a wooden spoon or silicone spatula. Do not use a whisk, this will cause bubbles in the glaze and affect the shine.
Once the mixture has boiled for about a minute, take off the heat and add the gelatine (which is now soft and has had a squeeze to remove the excess water)
Stir the gelatine in until completely dissolved. Then pass the mixture through a sieve encase of any lumps of sugar or cocoa powder.
Skim any impurities off of the top (A light coloured film that forms on the top once the glaze has sat for a few minutes). Sometimes there will be more to skim than others, don’t worry if you can’t see any.
Pour the mix into a container and cover with cling film touching the surface of the glaze.
Chill overnight until set.
Once the glaze is set you are free to melt GENTLY in the microwave until liquid again (about 37c-38c is the best. It will feel neither hot or cold when you dab a bit on your lip) and use for glazing as needed.
Don’t forget to pass the glaze through a sieve into a jug before glazing your items, any un-melted lumps can ruin the finished product.
Coloured glaze recipe
8g Gold leaf gelatine
50g Water
90g Glucose syrup
90g Caster sugar
90g White chocolate
45g Condensed milk
40g Neutral glaze (or apricot jam)
5g FAT BASED/ Soluble food colouring, depending on how strong you want the colour.
IMPORTANT: (The colouring will be in powder form, adding water based colouring to this recipe will cause it to seize up and become un-useable)
Method
Soak the gelatine in ice or at least very cold water, be sure to put the leaves into the water separately and not in a stack.
Place the water, sugar and glucose into a pan and bring to the boil for 2 minutes.
After it boils take off the heat and add the gelatine (which is now soft and has had a squeeze to remove the excess water)
Pour this warm mixture over the chocolate and stir with a wooden spoon until incorporated and all the chocolate is melted.
Add the glaze (or apricot jam), condensed milk and colouring to the mix. Blitz with a hand blender until the mix is smooth and completely even in colour.
Pour the mix through a sieve into a container and cover with cling film touching the surface of the glaze.
Chill overnight until set.
Once the glaze is set you are free to melt GENTLY in the microwave until liquid again. (about 29c-30c is the best for this glaze). Pass through a sieve again into a jug before glazing your items
Why is the temperature so important?
On the recipes above you have probably seen that the temperature of the glaze while pouring over whatever you are glazing is very important.
A few degrees will make a huge difference in the results you get from your glazes. Each time you use a new recipe it needs to be tested out to find the perfect temperature to coat the item well, but also not to be too thick.
When your glaze is too cold, what will happen is that it will set quickly as soon as it is poured onto a frozen surface. This causes the glaze to set in ripples and gives you a bumpy surface instead of a flat shiny finish.
When the glaze is too hot you run the risk of melting whatever it is you are glazing. Once the mousse (for example) melts and mixes with the glaze, the product will lose it shape and the glaze will be dull. It is also more likely to be too thin to stick to the surface, resulting in a thin and see-through layer of glaze.
How do you glaze big cakes properly?
Glazing big cakes is one of the most satisfying jobs in the pastry but trust me it can lead to a few disasters while you are getting the hang of it. Most of the time it involves holding the frozen cake at eye level with just the tips of your fingers.
After getting used to it the process becomes second nature. However learning can be stressful. especially if you only have one cake and no time to make another if anything goes wrong. The best advice is keep your fingers wide and don’t think too much about it.
How do you store glaze and how long for?
With storing glazed products you want to try and get them all used up on the same day you glaze them.
If you keep glazed products in the fridge overnight the shine will start to dull and it loses a lot of its effect.
The best way to manage always having freshly glazed products is make big batches of things such as petit gateaux. Then just freshly glaze however many you need daily.
Just be careful to leave enough time for them to defrost before you need them.
To learn how to make glazed raspberry and milk chocolate mousse petit gateau (pictured) sign up for a free account with The Online Pastry School here: https://becomeapastrychef.co.uk/login-register/


